How to install Redis configuration on HestiaCP
Overview
What is Redis?
Redis is open-source software that stores data structures in RAM on the server. This software can be used as a database or as a cache.
For WordPress websites, Redis can be used to cache the processing data declared by WP_Object_Cache. In short and easy to understand, Object Cache in WordPress will help the server save time processing queries in PHP or Database by storing cached data somewhere, and Redis will help us store these data in memory for faster access than saving to the hard drive.
What is Redis-PHP?
Redis php is an extension for PHP that provides an API to communicate with Redis’s key-value store.
Implementation guide
To install Redis configuration on HestiaCP, you perform 4 installation steps and 1 configuration step on the website.
Step 1: Login the SSH to the system
To perform the installation, you need to access the server via the SSH protocol. If you do not know how to do it, please refer to the instructions below:
- How to log in to Linux VPS via SSH protocol
Step 2: Install Redis server on HestiaCP
First, I will install the redis-server package with the command below. If the system displays a message to select Y / N, enter Y corresponding to Yes to do it.
sudo apt update
sudo apt install redis-server
sudo systemctl enable redis-server
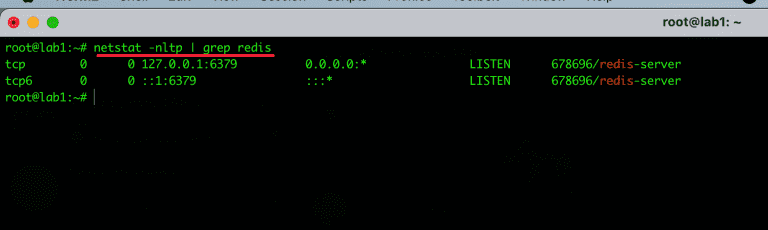
After the installation is complete, please netstat to check if redis is listening. After netstat, if the screen shows the results as below, the installation step has been successful.
Step 2: Configure Redis
After installing the package, open the redis.conf file and adjust the configuration as below. use vi, vim or nano command to edit. Here I will use the default vi command for editing.
vi /etc/redis/redis.conf
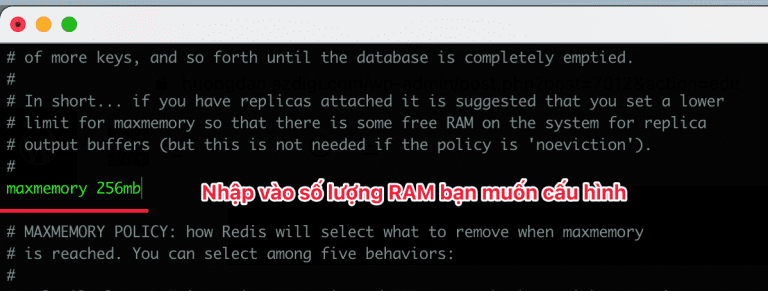
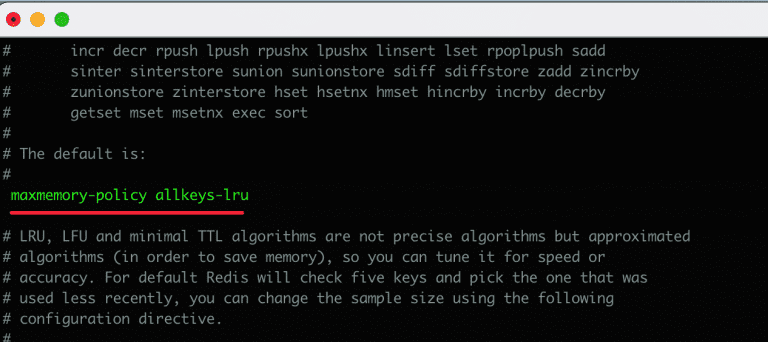
After you have opened the file, move the cursor to the lines and edit as follows:
- maxmemory 256mb (can increase more if your VPS RAM a lot)
- maxmemory-policy allkeys-lru
After adjusting and saving, you need to restart redis to apply the changes.
sudo systemctl restart redis-server
Step 3: Install PHP Extension Redis
Next, you need to install the extension php redis to make the communication environment connect with the following command:
sudo phpenmod -v 7.4 -s ALL redis
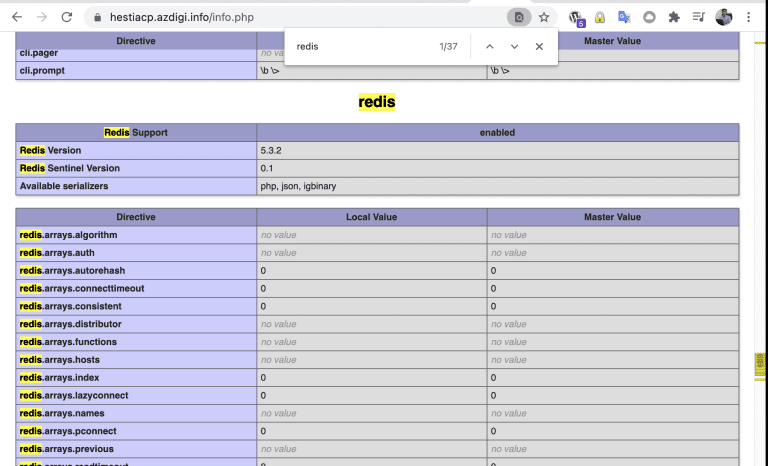
After installing Extension redis php, you can quickly check with the info.php file. I will create a file info.php in the source code with the following file content:
Step 4: Check the connection to the Redis server
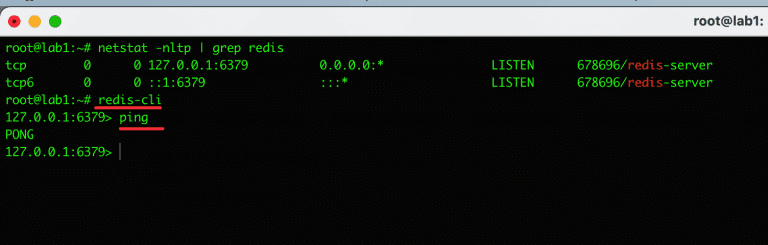
You use theredis-cli tool available to check the connection as follows:
root@lab1:~# redis-cli
127.0.0.1:6379> ping
PONG
127.0.0.1:6379>
Step 5: Configure Redis on the website
After installing Redis on HestiaCP, please configure Redis on the website to work. Each source code will have a different configuration. In this article, I will guide you to configure it on WordPress using the Redis developer’s dedicated plugin.
I will use the Redis Object Cache Plugin to configure it.
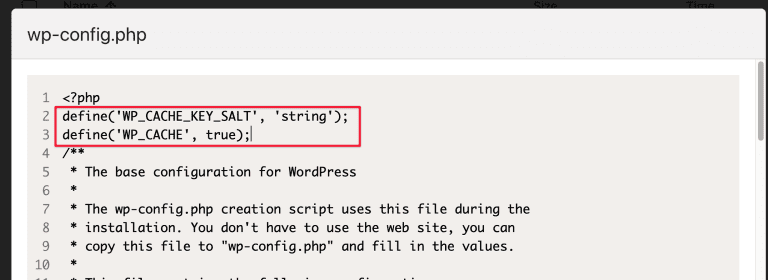
Before installing, open wp-config.php file and add the following code to authenticate the key:
define('WP_CACHE_KEY_SALT', 'string');
define('WP_CACHE', true);
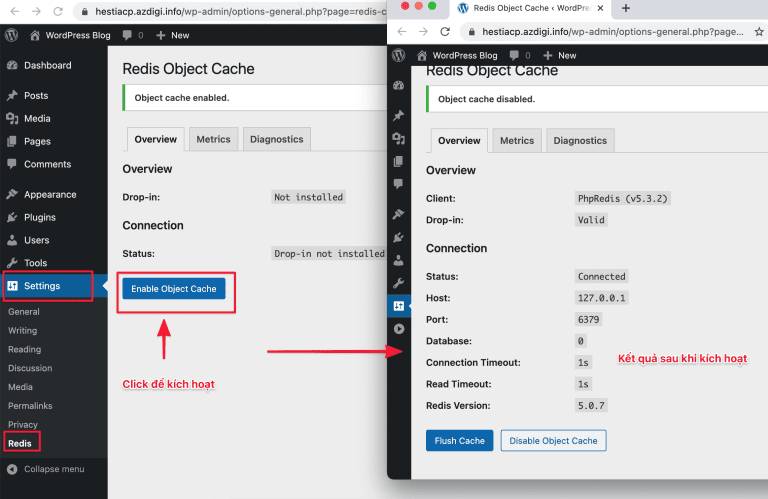
Next, install the Redis Object Cache plugin. It installs a PHP script that helps WordPress communicate with Redis
After installing the plugin, you need to enable it by navigating to Cài đặt => Redis => click “Enable Object Cache” and the Status show “Connected”. If not, ensure you have added the configuration to the wp-config.php file as above.
Summary
Hopefully, this article will help you to successfully install Redis configuration on HestiaCP without any problems, thereby having a stable and powerful server.
Wishing you success!