How to Install ISPConfig on Ubuntu 24.04 LTS
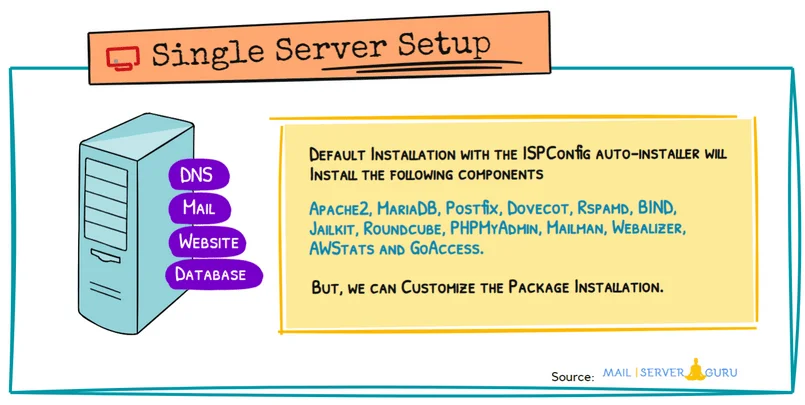
We will run the auto-installer with the options for a complete install. The basic setup includes the following software packages and their dependencies: Apache2, PHP (versions 5.6 – 8.0), MariaDB, Postfix, Dovecot, Rspamd, BIND, Jailkit, Roundcube, PHPMyAdmin, Mailman, Webalizer, AWStats, and GoAccess. By passing arguments to the installer, we can exclude certain functions or install extra services.
Prerequisites
Operating System: Ubuntu 24.04 LTS (also applies to Debian 11, 12 and Ubuntu 22.04)
CPU Architecture: Intel or AMD 64-bit or ARM (ARM64) CPU architecture.
Internet Access: Required for downloading software packages.
System Setup:
- Start with a clean OS installation.
- Do not block any port from the firewall, better disable it during Installation.
- DNS resolution must be functioning correctly.
Step1: Login as Root
Log in as root or run
sudo -sStep2: Configure the hostname and hosts entry
We must configure the server hostname properly and provide a proper entry at the /etc/hostname and /etc/hosts file. The /etc/hostname should only contain the subdomain part, not the full FQDN.
vi /etc/hostname

isp

:x
Provide the /etc/hosts entry properly, otherwise it won’t respond with the FQDN.
127.0.0.1 localhost.localdomain   localhost

# This line should be changed to the correct servername:
202.191.120.10 isp.mailserverguru.com  isp

# The following lines are desirable for IPv6 capable hosts
::1     localhost ip6-localhost ip6-loopback
ff02::1 ip6-allnodes
ff02::2 ip6-allrouters
The “hostname” command will return the subdomain part, and the “hostname -f” command should return the Fully Qualified Domain Name.
root@isp:~# hostname
isp
root@isp:~# hostname -f
isp.mailserverguru.com
root@isp:~#
Step3. Update the system
To update and upgrade to the latest packages, run the command:
apt update && apt upgradeStep4: Run the auto-installer
Auto-installer with the below arguments will install Apache web server and a port range for Passive FTP; unattended upgrades are not mandatory but highly recommended. Run:
wget -O - https://get.ispconfig.org | sh -s -- --use-ftp-ports=40110-40210 --unattended-upgradesIf we want to install Nginx instead of Apache, we must provide the argument “–use-nginx”. The rest of the parameters will remain the same.
wget -O - https://get.ispconfig.org | sh -s -- --use-nginx --use-ftp-ports=40110-40210 --unattended-upgradesAfter executing the above command, it will check and install the required PHP packages, and then it will pop up the message below.

Type “yes” and hit enter. The installer will now start.
When the installer is finished, it will Check all services are running and show you the ISPConfig admin and MySQL root password like this:
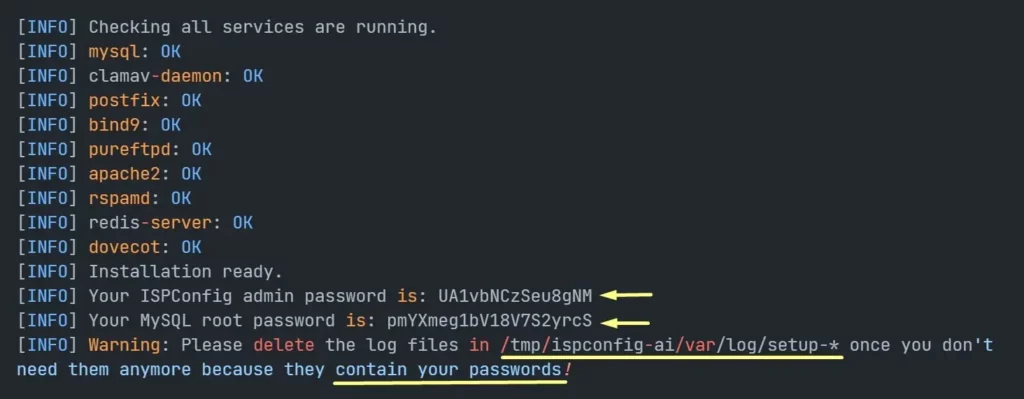
Save the ISPConfig admin password and MySQL root password for later use.
Finally, we can delete the log file /tmp/ispconfig-ai/var/log/setup-*. because it contains the passwords.
rm -rf /tmp/ispconfig-ai/var/log/setup-*Step5: Login to ISPConfig
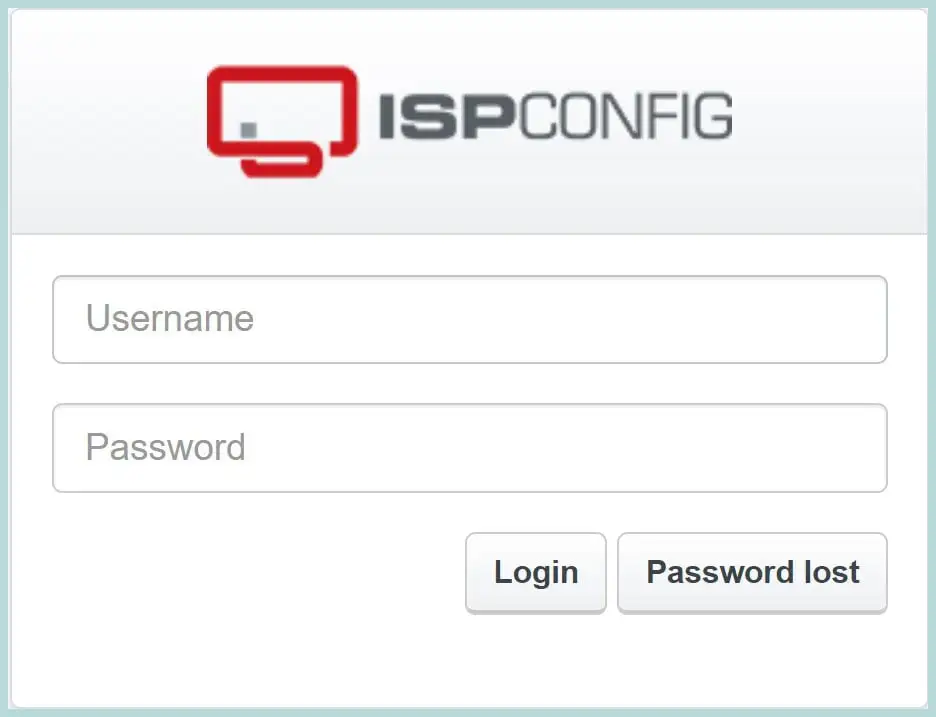
Now, you can access ISPConfig with the URL https://YOUR_FQDN_OR_IP:8080. The ISPConfig Login page will appear. Log in with “Username” as admin and provide the Password you saved from the last output.
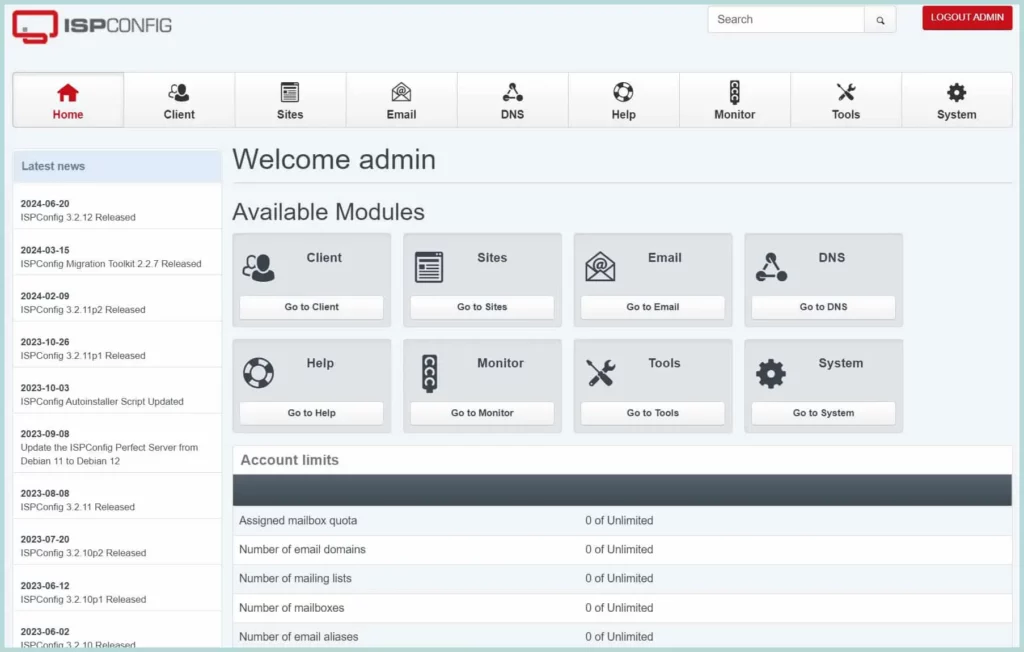
After successful login, the ISPConfig dashboard will appear. You can see more dashboard screenshots at the beginning of this post.
Step6: Post Setup
After the ISPConfig setup, we need to apply some basic security settings, such as changing the default password and enabling the firewall. Both can be done from the ISPConfig dashboard.
1. Change the Default Password
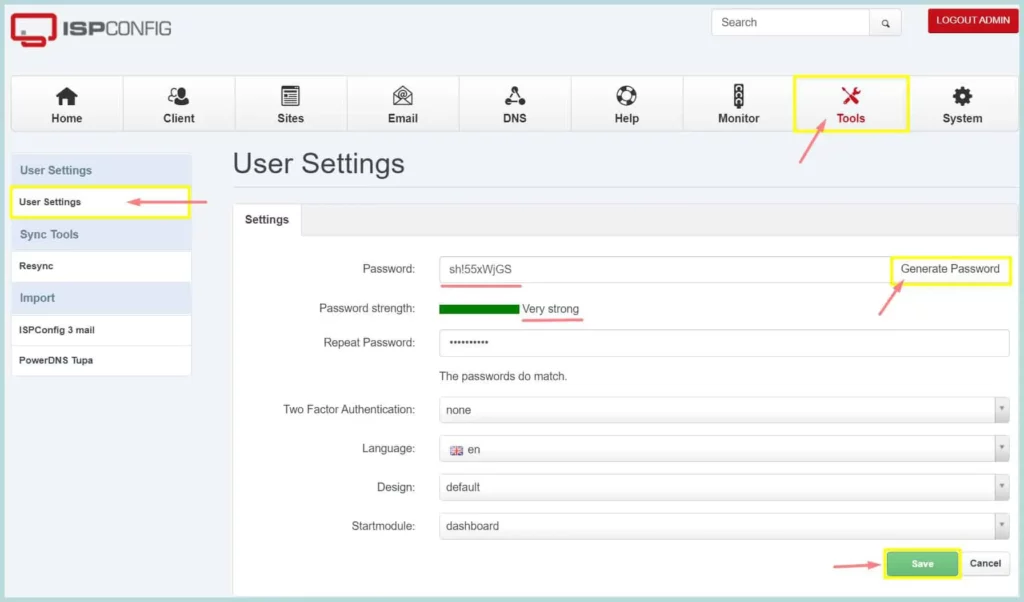
To secure ISPConfig login, we need to use a strong admin password. Login to the ISPConfig UI, and go to Tools -> User Settings. Then click “Generate Password”. Make sure the “Password Strength” shows “Very Strong”. You can also provide your own strong password. Now, Repeat the same password and click “Save”. You have successfully changed the admin password. To successfully complete this task, please follow the screenshot below.
2. Configure ISPConfig Firewall
By default, ISPConfig doesn’t impose a firewall policy. However, we should apply proper firewall rules to any public server; otherwise, systems can be compromised easily. We should configure the recommended firewall policy for ISPConfig.
If you check the system’s firewall from the CLI, you won’t see any rules applied; the UFW firewall is inactive.

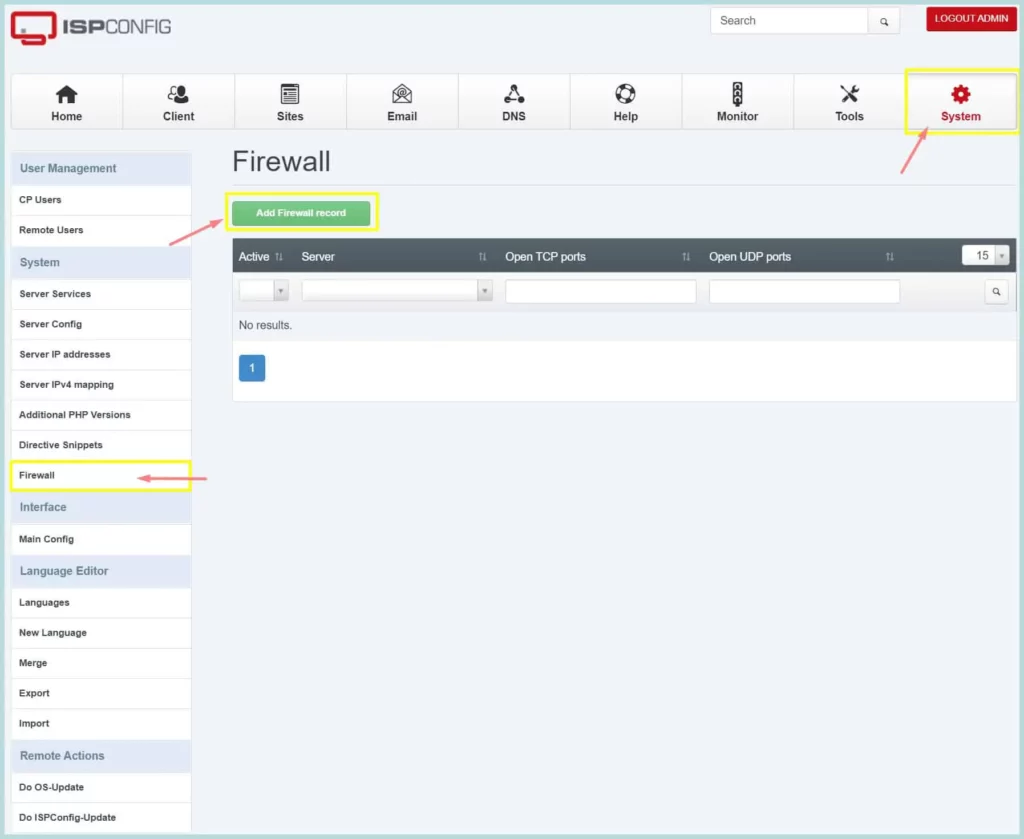
To configure the UFW firewall, Go to Systems -> Firewall, then click “Add firewall record”, you can follow the screenshot below.
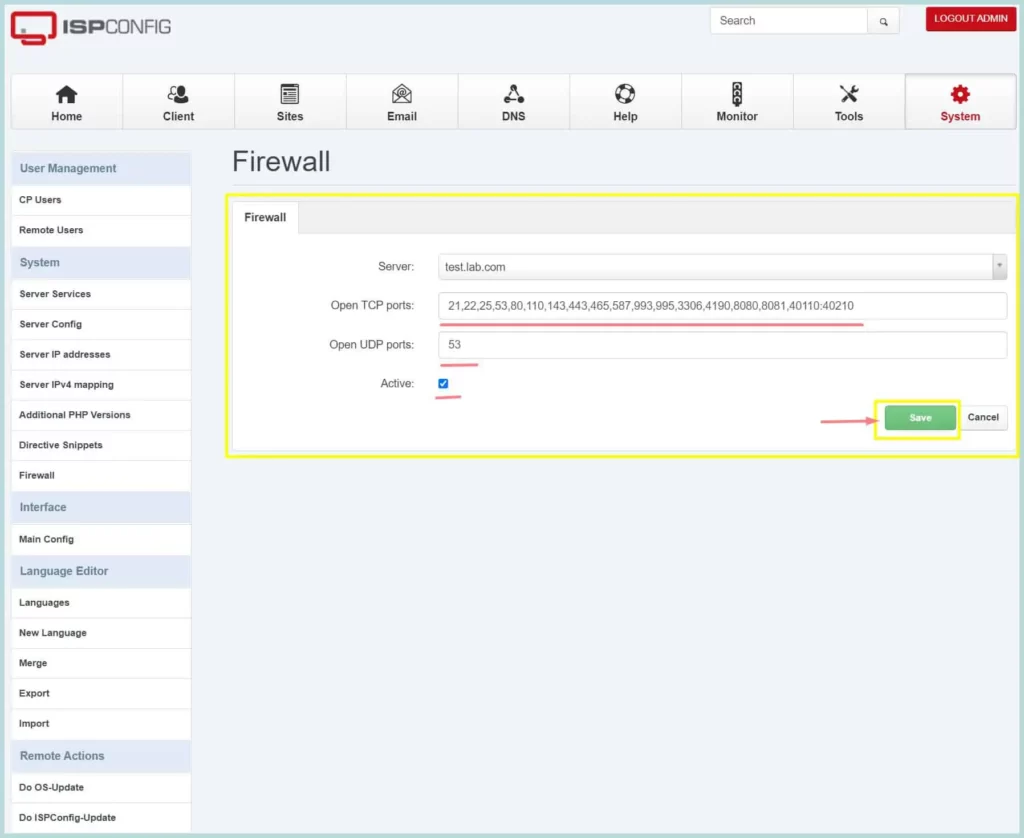
The default firewall rule will open the required ports for the services installed. There are TCP and UDP ports. The allowed ports are 21, 22, 25, 80, 443, 40110-40210, 110, 143, 465, 587, 993, 995, 53, 8080, 8081.
The necessary ports for the services are listed below
- Web: 20, 21, 22, 80, 443 and 40110-40210 (All TCP, no UDP)
- Mail: 25, 110, 143, 465, 587, 993, and 995 (All TCP, no UDP)
- DNS: 53 (TCP and UDP)
- Panel: 8080 and 8081 (All TCP, no UDP)
Now, Click “Save” to apply the firewall rules.
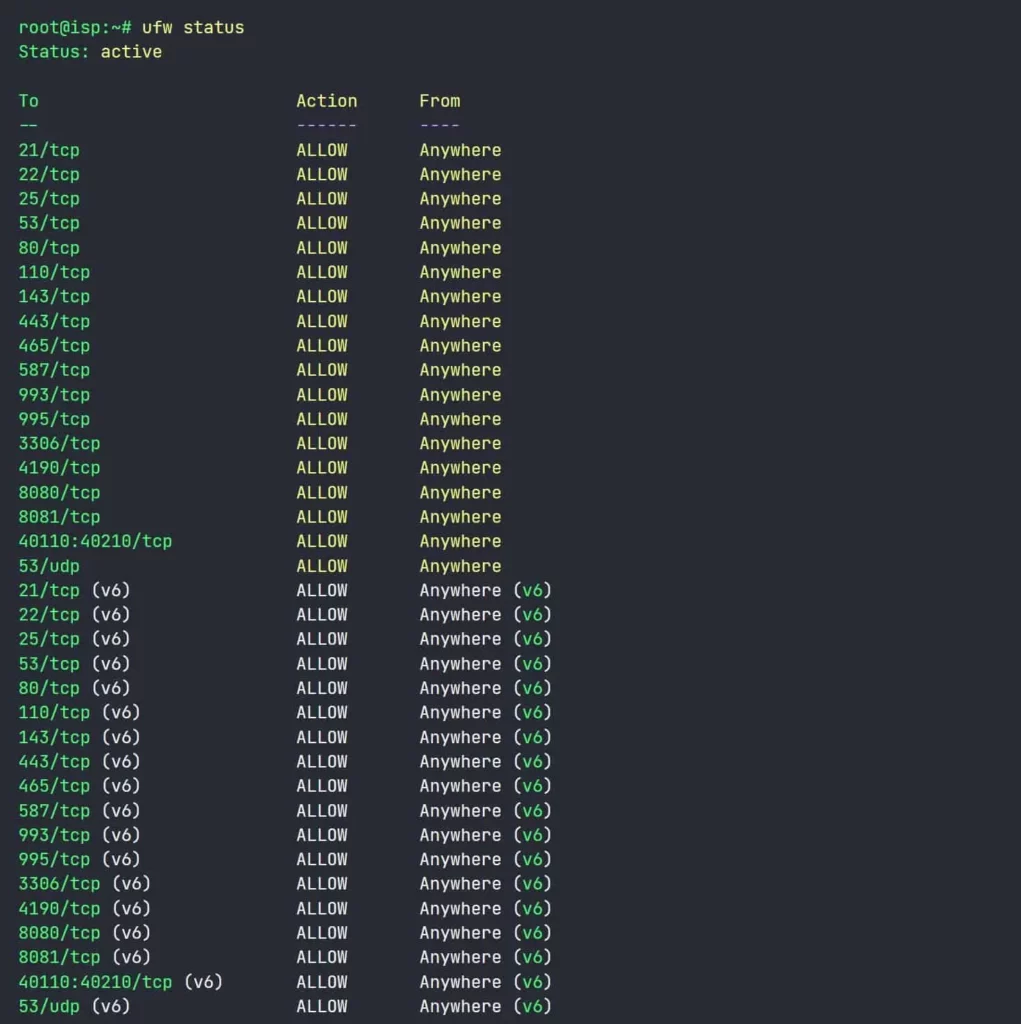
Now, you can check whether the firewall rules are applied to the server. Go to Systems CLI and type “ufw status.” It will show that the rules are applied. Please follow the image below.
this is it—congratulations! You have completed the ISPConfig setup.
Resources and Final Thoughts.
If the installation goes wrong, we can debug the process by adding the “–debug” option to the auto-installer. This will put all debug logs in this file: /tmp/ispconfig-ai/var/log/ispconfig.log. You can run the command below on another shell to see what’s happening during the installation in real time.
tail -f /tmp/ispconfig-ai/var/log/ispconfig.log